TextMeshProとDOTween Proをつかってゲームの起動時のタイトルをいい感じにする【Unity,TextMeshPro,DOTween】

デモ

使用アセット

TextMeshProの日本語化

hi-network.sakura.ne.jp

blog.naichilab.com

TextMeshProのoutlineについて

tsubakit1.hateblo.jp

kazupon.org

実装

タイトルのアニメーション

using System;
using Cysharp.Threading.Tasks;
using DG.Tweening;
using TMPro;
using UnityEngine;

public class TitleAnimation : MonoBehaviour
{
    [SerializeField] private TextMeshProUGUI title;
    // Start is called before the first frame update
    async void Start()
    {
        await UniTask.Delay(TimeSpan.FromSeconds(1f));
        title = GetComponent<TextMeshProUGUI>();
        DOTweenTMPAnimator tmproAnimator = new DOTweenTMPAnimator(title);
        for (int i = 0; i < tmproAnimator.textInfo.characterCount; ++i)
        {
            tmproAnimator.DOScaleChar(i, 0.7f, 0);
            Vector3 currCharOffset = tmproAnimator.GetCharOffset(i);
            DOTween.Sequence()
                .Append(tmproAnimator.DOOffsetChar(i, currCharOffset + new Vector3(0, 30, 0), 0.4f).SetEase(Ease.OutFlash, 2))
                .Join(tmproAnimator.DOFadeChar(i, 1, 0.4f))
                .Join(tmproAnimator.DOScaleChar(i, 1, 0.4f).SetEase(Ease.OutBack))
                .SetDelay(0.07f * i);
        }
    }
}

メニュー選択

using System;
using System.Collections.Generic;
using Cysharp.Threading.Tasks;
using TMPro;
using UniRx;
using UniRx.Triggers;
using UnityEngine;

public class SelectButton : MonoBehaviour
{
    
    [SerializeField] private List<TextMeshProUGUI> menuList;
    [Header("game mode")]
    [SerializeField] private Canvas settingsPanel;
    [SerializeField] private Canvas gameContinuePanel;
    private TextMeshProUGUI selectedMenu;

    private int menuIndex = 0;
    private bool isOpenSettings = false;
    private bool isOpenContinue = false;

    private const float OutlineWidth = 0.3f;
    // Start is called before the first frame update
    void Start()
    {
        selectedMenu = menuList[menuIndex];
        selectedMenu.outlineWidth = OutlineWidth;
        Debug.Log(selectedMenu.name);
        this.UpdateAsObservable().Subscribe(
                _ =>
                {
                    if (menuIndex < menuList.Count-1 && Input.GetKeyDown(KeyCode.DownArrow))
                    {
                        selectedMenu.outlineWidth = 0f;
                        menuIndex++;
                        selectedMenu = menuList[menuIndex];
                        selectedMenu.outlineWidth = OutlineWidth;
                        Debug.Log(selectedMenu.name);
                    }else if (0 < menuIndex && Input.GetKeyDown(KeyCode.UpArrow))
                    {
                        selectedMenu.outlineWidth = 0f;
                        menuIndex--;
                        selectedMenu = menuList[menuIndex];
                        selectedMenu.outlineWidth = OutlineWidth;
                        Debug.Log(selectedMenu.name);
                    }
                    if(Input.GetKeyDown(KeyCode.Z))OpenMenu();
                });
    }

    async void OpenMenu()
    {
        if (selectedMenu.name == "NewGame")
        {
            Debug.Log("new game");
        }else if (selectedMenu.name == "Continue")
        {
            isOpenContinue = true;
            gameContinuePanel.gameObject.SetActive(true);
            await UniTask.Delay(TimeSpan.FromSeconds(3f));
            gameContinuePanel.gameObject.SetActive(false);
        }else if (selectedMenu.name == "Settings")
        {
            isOpenSettings = true;
            settingsPanel.gameObject.SetActive(true);
            await UniTask.Delay(TimeSpan.FromSeconds(3f));
            settingsPanel.gameObject.SetActive(false);
        }else if (selectedMenu.name == "Exit")
        {
            #if UNITY_EDITOR
                  UnityEditor.EditorApplication.isPlaying = false;
            #elif UNITY_STANDALONE
                  UnityEngine.Application.Quit();
            #endif
        }
    }

    void SettingOption()
    {
        
    }
}

参考サイト

game-ui.net

EasySave3で自作のclassを使って保存する【Unity,EasySave3】

はじめに

ゲームのテンプレートを作成してる中でセーブ&ロードは必須だろうと思い実装をしていたのですが,基本EasySaveではint,sting,Vectorしか保存できないみたいなので自作のclassどうやってやるんだろうと思い,思ったよりも時間がかかったので記事にしておきます
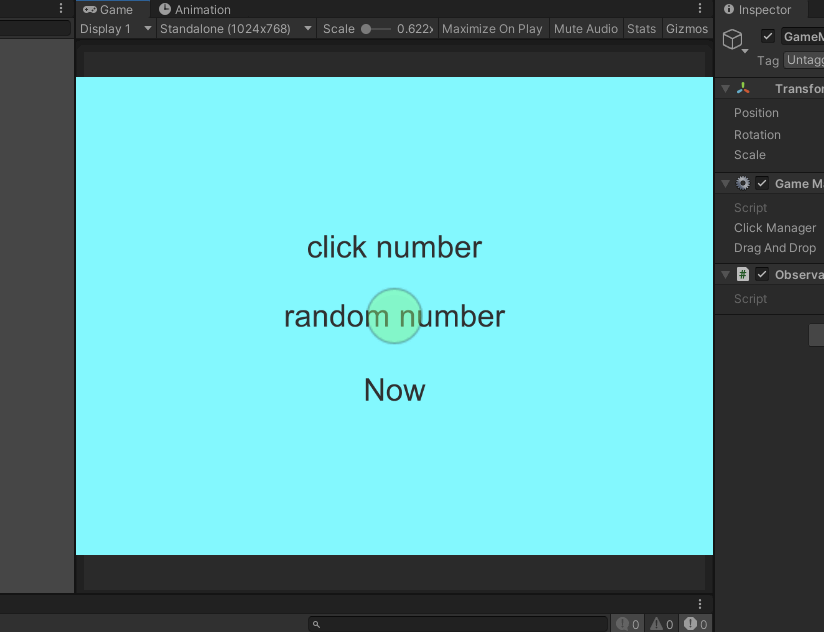
サンプルアプリ

実際に今回は以下のようなものを作って自作のclassの情報をセーブ&ロードしてみました

  • 現在時間を取得・表示
  • 画面のクリックの取得・表示
  • 画面をクリックしたときにランダムの数字を発行・表示
  • ドラッグアンドドロップできるUIを配置(この位置を保存)

こんな感じで動きます 途中で保存,最後のほうでロードしています

使用アセット

実装

難しいことではなく,単にclass -> jsonにしてからstringで保存すればよかったみたいです

ドラッグアンドドロップ

using System;
using UnityEngine;
using UnityEngine.EventSystems;
using UnityEngine.UI;

// Imageコンポーネントを必要とする
[RequireComponent ( typeof ( Image ) )]

// ドラッグとドロップに関するインターフェースを実装する
public class DragAndDrop : MonoBehaviour, IDragHandler, IBeginDragHandler, IEndDragHandler
{
    [SerializeField] private Image circle;
    private Color _beforeColor;
    private Vector3 _circlePosition;

    private void Start()
    {
        _circlePosition = transform.position;
    }

    public void OnBeginDrag ( PointerEventData eventData )
    {
        _beforeColor = circle.color;
        circle.color = Color.red;
    }

    public void OnDrag ( PointerEventData eventData )
    {
        // ドラッグ中は位置を更新する
        transform.position = eventData.position;
    }

    public void OnEndDrag ( PointerEventData eventData )
    {
        circle.color = _beforeColor;
        transform.position = eventData.position;
        _circlePosition = eventData.position;
    }

    public Vector3 GetCirclePosition()
    {
        return _circlePosition;
    }

    public void SetCirclePosition(Vector3 position)
    {
        gameObject.transform.position = position;
    }
}

セーブ&ロード

using UniRx;
using UniRx.Triggers;
using UnityEngine;

public class GameManager : MonoBehaviour
{
    [SerializeField] private ClickManager clickManager;

    [SerializeField] private DragAndDrop dragAndDrop;
    private SaveData _saveData;

    private void Start()
    {
        #region save data
        this.UpdateAsObservable().Where(_ => Input.GetKeyDown(KeyCode.S)).Subscribe(_ =>
        {
            _saveData = new SaveData();
            _saveData.Time = clickManager.GetTime();
            _saveData.RandomNumber = clickManager.GetRandomNumber();
            _saveData.ClickNumber = clickManager.GetClickCount();
            _saveData.CirclePosition = dragAndDrop.GetCirclePosition();
            SaveES3(_saveData);
        });
        #endregion

        #region load data

        this.UpdateAsObservable().Where(_ => Input.GetKeyDown(KeyCode.L)).Subscribe(_ =>
        {
            SaveData saveData = LoadES3("1");
            dragAndDrop.SetCirclePosition(saveData.CirclePosition);
            clickManager.SetText(saveData.Time,saveData.ClickNumber,saveData.RandomNumber);
        });

        #endregion
    }

    void SaveES3(SaveData saveData)
    {
        string json = JsonUtility.ToJson(saveData);
        Debug.Log(json);
        ES3.Save("1",json);
    }
    
    SaveData LoadES3(string key){
        if (ES3.KeyExists(key))
        {
            var json = ES3.Load<string>(key);
            Debug.Log(json);
            SaveData saveData = JsonUtility.FromJson<SaveData>(json);
            return saveData;
        }
        else
        {
            return null;
        }
    }
}

class SaveData
{
    public string Time;
    public string RandomNumber;
    public string ClickNumber;
    public Vector3 CirclePosition;
}

クリックしたときの処置

using System;
using UnityEngine;
using UnityEngine.EventSystems;
using UnityEngine.UI;
using Random = UnityEngine.Random;

public class ClickManager : MonoBehaviour,IPointerClickHandler
{
    [SerializeField] private Text timeText;
    [SerializeField] private Text clickCountText;
    [SerializeField] private Text randomNumberText;
    private int _clickCount = 0;
    

    public void OnPointerClick(PointerEventData eventData)
    {
        int temp = Random.Range(0, 100);
        randomNumberText.text = "randomNumber:"+temp;

        _clickCount++;
        clickCountText.text = "clickCount:"+_clickCount;
        timeText.text = "now time:" + DateTime.Now.ToLongTimeString();
    }

    public string GetTime()
    {
        return timeText.text;
    }

    public string GetClickCount()
    {
        return clickCountText.text;
    }

    public string GetRandomNumber()
    {
        return randomNumberText.text;
    }

    public void SetText(string time, string clickCount, string randomNumber)
    {
        timeText.text = time;
        clickCountText.text = clickCount;
        randomNumberText.text = randomNumber;
    }
}

参考サイト

kan-kikuchi.hatenablog.com

kazupon.org

unity-shoshinsha.biz

negi-lab.blog.jp

http://magcat.php.xdomain.jp/brog/?p=195magcat.php.xdomain.jp

PySide2で音声を録音・文字起こしをする【PySide2,Python】

PySide2でリアルタイムで文字起こし,音声の録音をやってみたいと思います

実行結果

実行すると録音の音声ファイル recorded.wavとその録音音声内容のrecordedText.txtが保存されます f:id:ayousanz:20200904104754p:plain

音声の認識が良くないのか,自分の発音が良くないのか...

正確には録音できない時があります f:id:ayousanz:20200904104908p:plain

準備

今回必要なものをconda でinstallします

音声を扱うためのライブラリ

conda install -c anaconda pyaudio

録音をするためにライブラリ

conda install -c conda-forge speechrecognition

Code

import speech_recognition as sr


def main():
    r = sr.Recognizer()

    with sr.Microphone() as source:
        r.adjust_for_ambient_noise(source)

        print("Please say something")

        audio = r.listen(source)

        print("Recognizing Now .... ")

        # recognize speech using google

        try:
            print("You have said \n" + r.recognize_google(audio))
            print("Audio Recorded Successfully \n ")


        except Exception as e:
            print("Error :  " + str(e))

        # write audio and text

        with open("recorded.wav", "wb") as f:
            f.write(audio.get_wav_data())

        with open("recordedText.txt", "w") as f:
            s = str(r.recognize_google(audio))
            f.write(s)

if __name__ == "__main__":
    main()

参考サイト

codeloop.org

Siv3Dでドロップした画像をグレイスケール化する【C++,Visual Studio】

前回の続きです

前回の記事

ayousanz.hatenadiary.jp

実行結果

f:id:ayousanz:20200903145323p:plain

操作?画面

f:id:ayousanz:20200903145348g:plain

グレイスケールにする

siv3d.github.io

画像をドロップして表示する

siv3d.github.io

Code

# include <Siv3D.hpp>
using namespace std;

void Main()
{
    Texture textureInput;
    Texture textureOutput;

    double scale = 1.0;

    Array<Rect> detectedFaces;
    const PixelShader ps(U"example/shader/2d/grayscale" SIV3D_SELECT_SHADER(U".hlsl", U".frag"),
        { { U"PSConstants2D", 0 } });

    if (!ps)
    {
        throw Error(U"Failed to load a shader file");
    }

    while (System::Update())
    {
         //ファイルがドロップされた
        if (DragDrop::HasNewFilePaths())
        {
            // ファイルを画像として読み込めた
            if (const Image image{ DragDrop::GetDroppedFilePaths().front().path })
            {
                // 画像の拡大縮小率
                scale = static_cast<double>(textureInput.width()) / image.width()/2;

                // 画面のサイズに合うように画像を拡大縮小
                textureInput = textureInput = Texture(image.fitted(Scene::Size()));
                textureOutput = textureOutput = Texture(image.fitted(Scene::Size()));
                
            }
        }
        if (KeyA.down()) {
            Print << U"拡大率:" << scale;
        }

        if (textureInput)
        {
            //textureOutput.draw(100,100);
            Rect(0, 0, 400, 400)(textureInput).draw();
            ScopedCustomShader2D shader(ps);
            //textureOutput.draw(400,400);
            Rect(400, 0, 400, 400)(textureOutput).draw();
        }
    }
}

Siv3Dを試してみた【C++,Visual Studio】

twitterで以下のようなものが流れていたので自分でもやってみました (サンプルコードを動かしただけなので,特に何もしてません) (随時追加予定)

インストール等

siv3d.github.io

こちらを参考にすればうまくいくと思います

実行画面

f:id:ayousanz:20200903123127p:plain

ボタンを押したときにマウスのある所にアイコンを移動させる

実際の動き

f:id:ayousanz:20200903124854g:plain

Code

// 猫のテクスチャを用意
    const Texture cat(Emoji(U"🐈"));
    const Texture temp(Emoji(U"🐶"));

    // 猫の座標
    Vec2 catPos(640, 450);
    Vec2 dogPos(353, 242);

    while (System::Update())
    {
        // テキストを画面の中心に描く
        font(U"Hello, Siv3D!🐣").drawAt(Scene::Center(), Palette::Black);

        // 大きさをアニメーションさせて猫を表示する
        cat.resized(100 + Periodic::Sine0_1(1s) * 20).drawAt(catPos);
        temp.resized(100 + Periodic::Sine0_1(1s) * 20).drawAt(dogPos);

        // マウスカーソルに追従する半透明の赤い円を描く
        Circle(Cursor::Pos(), 40).draw(ColorF(1, 0, 0, 0.5));

        // [A] キーが押されたら
        if (KeyA.down())
        {
            // Hello とデバッグ表示する
            Print << U"Hello!";
        }

        // ボタンが押されたら
        if (SimpleGUI::Button(U"Move the cat", Vec2(600, 20)))
        {
            // 猫の座標を画面内のランダムな位置に移動する
            catPos = RandomVec2(Scene::Rect());
        }
        if (KeyB.down()) {
            cout << "hello" << endl;
            
            dogPos = Cursor::Pos();
        }
    }

Sive3Dからツイートする

ツイート画面

Code

# include <Siv3D.hpp>

void Main()
{
    const String text = U"Hello, Siv3D! #Siv3D";

    while (System::Update())
    {
        if (SimpleGUI::Button(U"Tweet", Vec2(20, 20)))
        {
            // text をつぶやくツイート投稿画面を開く
            Twitter::OpenTweetWindow(text);
        }
    }
}

引用元 siv3d.github.io

アニメーションを任意のタイミングで開始する【Unity】

今回は敵からプレイヤーに向かって火の玉を発射するものを作成してみました 火の玉がせいせいされたあとにプレイヤーに当たってからアニメーションを開始したかったのでメモついでに記録します

成果

f:id:ka1357amnbpdr:20200902184042g:plain

ゲーム公開

unityroom.com

実装方法

  1. 生成した後にAnimatorからアニメーションの開始をoffにします
gameobject.GetComponent<Animator>().enabled = false;

2.  任意のタイミングでアニメーションを開始します ここでは,プレイヤーに当たったときにアニメーションを開始しています

_animator.enabled = true;
_animator.Play("Base Layer.explosion",0,0);

Scripts

生成するscript(敵にアタッチ)

private void OnTriggerEnter2D(Collider2D other)
    {
        if (other.gameObject.CompareTag("Player"))
        {
            Debug.Log("プレイヤーが範囲に入った");
            isInPlayer = true;
            // var t = Instantiate(explosionPrefab, explosionPrefab.transform.position,explosionPrefab.transform.rotation);
            Observable.Interval(TimeSpan.FromSeconds(1f)).Where(_ => isInPlayer).Subscribe(_ =>
            {
                var t = Instantiate(explosionPrefab, parent.transform.position,explosionPrefab.transform.rotation);
                // t.GetComponent<Animator>().enabled = false;
                t.GetComponent<Rigidbody2D>().velocity = other.gameObject.transform.position;
            }).AddTo(this);
        }
    }

火の玉にアタッチ

private void OnTriggerEnter2D(Collider2D other)
    {
        if (other.gameObject.CompareTag("Player"))
        {
            Debug.Log("アニメーションスタート");
            _animator.enabled = true;
            _animator.Play("Base Layer.explosion",0,0);
        }
    }

参考サイト

docs.unity3d.com

qiita.com