NotionAPI(Python)を触ってみる【Notion,Python】

最近Notionというものを教えてもらいました!!(今更ですが) TrelloとEvernoteから乗り換えるのにいろいろと連携したりGASとの連携とかもあるので,scriptの移行のためにNotionAPIを触っていきたいと思います

<span style="color: #ff0000">NotionのAPIは2020/12現在 APIは非公式になっています</span>

今回は試しに触ってみるだけになるかと思われます.

以下NotionAPIとTrelloで毎日をタスクをアーカイブにしたものです

ayousanz.hatenadiary.jp

非公式サイトを確認する

github.com

このサイトで多くの方がすでに作られているのでこちらを使っていきます.

使い方等はこちらのReadMeに書かれています(今回はほぼReadMeを試すだけ??)

Notion Tokenを取得する

以下のサイトにやり方は書かれているので,参考にしてください

www.notion.so

環境を構築する

` Note: the latest version of notion-py requires Python 3.5 or greater. ‘と書いているので,ちょっと現在最新versinoのPython 3.9.1を使ってみたいと思います.

AnacondaでもPython3.9~に対応してるみたいなので,安心です

  1. conda crate -n notion python=3.9 で作成します.
  2. requirements.txtがあったので,こちらも入れていきます.
  3. pip install -r requirements.txt で依存ライブラリを入れていきます
  4. pip install notion なぜか Notionライブラリだけ入らないので,追加で入れます.

タイトルの取得とタイトルの更新

Quickstart
この部分をやってみます. 先ほど取得したTokenをいれて,テスト用のページの作成→URLを取得します

from notion.client import NotionClient

# Obtain the `token_v2` value by inspecting your browser cookies on a logged-in (non-guest) session on Notion.so
client = NotionClient(token_v2="your token")

# Replace this URL with the URL of the page you want to edit
page = client.get_block("page url")

print("The old title is:", page.title)

# Note: You can use Markdown! We convert on-the-fly to Notion's internal formatted text data structure.
page.title = "The title has now changed, and has *live-updated* in the browser!"

実行すると以下のようになります.

tableの操作(2021-3-2 追記)

tableの取得

url = "page url"
cv = client.get_collection_view(url)

for row in cv.collection.get_rows():
    print(row.title)

tableへの書き込み

row."なまえ"の部分は自分のtableのコラムの名前と一致しないと書き込みできないみたいです. また日本語はだめだったので英語のほうがいいと思います.

row = cv.collection.add_row()
row.name = "Just some data"
row.listName = "test"
row.deadline = datetime.date.today()
row.description = "hoge"

Cinemachineを使ってカメラの切り替えをする【Unity,Cinemachine】

本来やりたかったこととは違うのですが...副産物としてメモしておきます (あとからいい感じにしたものを再度編集しなおす可能性があります :キャラアニメション・カメラの角度等)

Demo

youtu.be

cameraの設置

下の画像で3つのカメラを設定しています.

カメラは Priority の高いものから移されます. 初めに移すものを高く設定します.

f:id:ayousanz:20201206151140p:plain

cameraの切り替えを特定の場所で切り替える.

以下の赤丸で囲ってるところにColliderを置いて,Triggerで切り替えるようにします. f:id:ayousanz:20201206150909p:plain

移動しているキャラクターに以下のスクリプトをアタッチして,Colliderにあったときに現在のカメラをOffにします.

using System.Collections.Generic;
using Cinemachine;
using UnityEngine;

public class CameraController : MonoBehaviour
{
    [SerializeField] private List<CinemachineVirtualCamera> vCameras;

    private int _currentCameraNumber = 0;
    // Start is called before the first frame update

    private void OnTriggerEnter(Collider other)
    {
        if (!other.gameObject.CompareTag("CameraSwitch/To2Camera") &&
            !other.gameObject.CompareTag("CameraSwitch/To3Camera")) return;
        vCameras[_currentCameraNumber].gameObject.SetActive(false);
        _currentCameraNumber++;
        other.gameObject.SetActive(false);
    }
}

参考サイト

light11.hatenadiary.com

tsubakit1.hateblo.jp

light11.hatenadiary.com

UnityでgRPCを使う時のエラー対策【Unity,gRPC】

Unity-gRPCを使うときのよくぶつかるエラー等をまとめています. 実際のやり方は記事中のサイトが詳しく説明されているので,そちらをご確認ください(ほぼ自分用のメモです)

~.protoファイルのファイルの権限を確認する

画像のようになっていればいいのですが,なぜか?000になっていたので以下のコマンドでファイルの権限を変更します

chmod 744 ファイル名

またはフォルダごと変えたい場合は chmod -R 744 フォルダ名

f:id:ayousanz:20201202221457p:plain

実行した時に開発元が〜と言われる

システム環境設定 -> セキュリティーとプライバシー -> 一般からファイルの実行を許可します

f:id:ayousanz:20201202221319p:plain

channel作成でgPRCの最大転送量を設定する

   at UniRx.Stubs.<>c.<.cctor>b__3_1(Exception ex)
   at UniRx.Operators.DoObservable`1.Do.OnError(Exception error)

この辺のサイトを参考にする

blog.xin9le.net

実際にするときにみる参考サイト

qiita.com

note.com

note.com

Oculus Handで手の甲の位置にMeshを生成する【Oculus,VR,Unity】

ハンドトラッキングをしたときにいろいろ処理を行う中で,手の甲の平面部分を使い部分があったためデバック用に 表示させたいと思います.

Demo

f:id:ayousanz:20201121212315g:plain

環境

  • Unity 2019.1.14
  • OOculus Integration 20.1

Pinchしたかどうかを取得する

方法としては以下の二つがあると思います.

  • OVRHand.GetFingerIsPinching(OVRHand.HandFinger.~) を使う
  • OVRHand.GetFingerPinchStrength(OVRHand.HandFinger.Index)を使う

OVRHand.GetFingerIsPinching(OVRHand.HandFinger.~)

指が現在ピンチ操作をしているかどうかを検出します.

OVRHand.GetFingerPinchStrength(OVRHand.HandFinger.Index)

現在ピンチ操作している指の強さをチェックします.

手の甲のボーンのそれぞれの位置を取得する.

各手のボーンのID(int)は以下のように設定されています. 公式サイトはこちら(以下はOVRSkelton.csの内部より引用)

       Invalid                 = OVRPlugin.BoneId.Invalid,

        Hand_Start              = OVRPlugin.BoneId.Hand_Start,
        Hand_WristRoot          = OVRPlugin.BoneId.Hand_WristRoot,          // root frame of the hand, where the wrist is located
        Hand_ForearmStub        = OVRPlugin.BoneId.Hand_ForearmStub,        // frame for user's forearm
        Hand_Thumb0             = OVRPlugin.BoneId.Hand_Thumb0,             // thumb trapezium bone
        Hand_Thumb1             = OVRPlugin.BoneId.Hand_Thumb1,             // thumb metacarpal bone
        Hand_Thumb2             = OVRPlugin.BoneId.Hand_Thumb2,             // thumb proximal phalange bone
        Hand_Thumb3             = OVRPlugin.BoneId.Hand_Thumb3,             // thumb distal phalange bone
        Hand_Index1             = OVRPlugin.BoneId.Hand_Index1,             // index proximal phalange bone
        Hand_Index2             = OVRPlugin.BoneId.Hand_Index2,             // index intermediate phalange bone
        Hand_Index3             = OVRPlugin.BoneId.Hand_Index3,             // index distal phalange bone
        Hand_Middle1            = OVRPlugin.BoneId.Hand_Middle1,            // middle proximal phalange bone
        Hand_Middle2            = OVRPlugin.BoneId.Hand_Middle2,            // middle intermediate phalange bone
        Hand_Middle3            = OVRPlugin.BoneId.Hand_Middle3,            // middle distal phalange bone
        Hand_Ring1              = OVRPlugin.BoneId.Hand_Ring1,              // ring proximal phalange bone
        Hand_Ring2              = OVRPlugin.BoneId.Hand_Ring2,              // ring intermediate phalange bone
        Hand_Ring3              = OVRPlugin.BoneId.Hand_Ring3,              // ring distal phalange bone
        Hand_Pinky0             = OVRPlugin.BoneId.Hand_Pinky0,             // pinky metacarpal bone
        Hand_Pinky1             = OVRPlugin.BoneId.Hand_Pinky1,             // pinky proximal phalange bone
        Hand_Pinky2             = OVRPlugin.BoneId.Hand_Pinky2,             // pinky intermediate phalange bone
        Hand_Pinky3             = OVRPlugin.BoneId.Hand_Pinky3,             // pinky distal phalange bone
        Hand_MaxSkinnable       = OVRPlugin.BoneId.Hand_MaxSkinnable,
        // Bone tips are position only. They are not used for skinning but are useful for hit-testing.
        // NOTE: Hand_ThumbTip == Hand_MaxSkinnable since the extended tips need to be contiguous
        Hand_ThumbTip           = OVRPlugin.BoneId.Hand_ThumbTip,           // tip of the thumb
        Hand_IndexTip           = OVRPlugin.BoneId.Hand_IndexTip,           // tip of the index finger
        Hand_MiddleTip          = OVRPlugin.BoneId.Hand_MiddleTip,          // tip of the middle finger
        Hand_RingTip            = OVRPlugin.BoneId.Hand_RingTip,            // tip of the ring finger
        Hand_PinkyTip           = OVRPlugin.BoneId.Hand_PinkyTip,           // tip of the pinky
        Hand_End                = OVRPlugin.BoneId.Hand_End,

twitterで見やすくまとめられている方もいらっしゃるので,公式よりも見やすい?

任意のボーンからメッシュを作成する

以下のサイトを参考にしています.

nn-hokuson.hatenablog.com

インデックスの順番だけ反時計回りにしないと表示されなかったので,注意です

var rightHandMesh = new Mesh
            {
                vertices = new[]
                {
                    rightHandSkeleton.Bones[3].Transform.position,
                    rightHandSkeleton.Bones[6].Transform.position,
                    rightHandSkeleton.Bones[15].Transform.position,
                    rightHandSkeleton.Bones[16].Transform.position
                },
                uv = new[] {new Vector2(1, 0), new Vector2(1, 1), new Vector2(0, 0), new Vector2(0, 1),},
                triangles = new[] {0, 1, 2, 1, 3, 2}
            };
            rightReferencePlane.GetComponent<MeshFilter>().sharedMesh = rightHandMesh;
            rightReferencePlane.GetComponent<MeshRenderer>().material = material;
            Debug.Log("基準 right hand planeの作成");

Odinを使ってカスタムReactivePropertyをInspectorに表示させる【Unity,Odin】

内容はそこまで深いものはないですが,ちょっと自分の中で使えると思ってためにメモついでに上げておきます.
私が調べた中では ReactiveProperty (Enum)は SerializeField を使っても表示をできるようにするにはひと手間必要でした もしかしたら,簡単にする方法があるのかもしれませんが..
(boolやintなどは SerializeField で表示することができます)

適応後の見え方

ReactivePropertyとは

以下のサイトより簡単に引用すると

値の変更を通知してくれる変数のようなもの

難点としては

カスタムReactivePropertyを使用する際の注意点として、ジェネリック型のクラスはインスペクタで表示できないのがUnityの仕組みとなっています。

詳しくは以下のサイトを参考にしてください

github.com

qiita.com

nobollel-tech.hatenablog.com

Odinとは

Inspectorをいい感じに見せてくれるアセットです

assetstore.unity.com

詳しい説明は以下のサイトで,いろいろ説明をしてくださっているのでみてください

kan-kikuchi.hatenablog.com

また,アセットストアの動画にもいろいろあるのでそこで確認するのもいいと思います.

youtu.be

youtu.be

カスタムReactivePropertyをInspectorに表示させる方法

classを作成して,SerializeFieldをつける方法

qiita.com

Odinを使う

[ShowInInspector] をつける
こちらは表示するだけなので,変更したときに保存することはできません

公式サイトの説明より

ShowInInspectorはすべてのメンバーで使用され、インスペクターに値を表示します。ShowInInspector属性は何もシリアル化しないことに注意してください。つまり、行った変更は、ShowInInspector属性だけでは保存されません。経験則として:ShowInInspector属性なしでインスペクターに表示されないフィールドまたはプロパティはシリアル化されません。シリアル化デバッガーを使用して、クラスでシリアル化されているものとシリアル化されていないものの概要を把握します。

RollBollGameをDoozyUIを使って書き換える【Unity,DoozyUI】

最近DoozyUIを買ったので,学習ついでにRollBollにDoozyUIを使ってみたいと思います. 中で使っているゲームはUnityのサンプルでも有名なRollBallをちょっとデモ用にいろいろ変更したものを使っています

Doozy UIとは

アセットストアより引用

DoozyUI は、Unity Editor のネイティブ拡張であり、コーディングを知らなくても、プロフェッショナルなユーザーインターフェースを簡単に管理およびアニメーション化できます。初心者にやさしく、スケーラブルな DoozyUI は、アマチュア開発者からプロのソフトウェアおよびゲームスタジオまで、あらゆる対象に最適です。

だそうです.

実際Canvasの切り替えや音の管理などは表示に楽になります(シーンのロードなどはまだ理解してません)

assetstore.unity.com

Demo

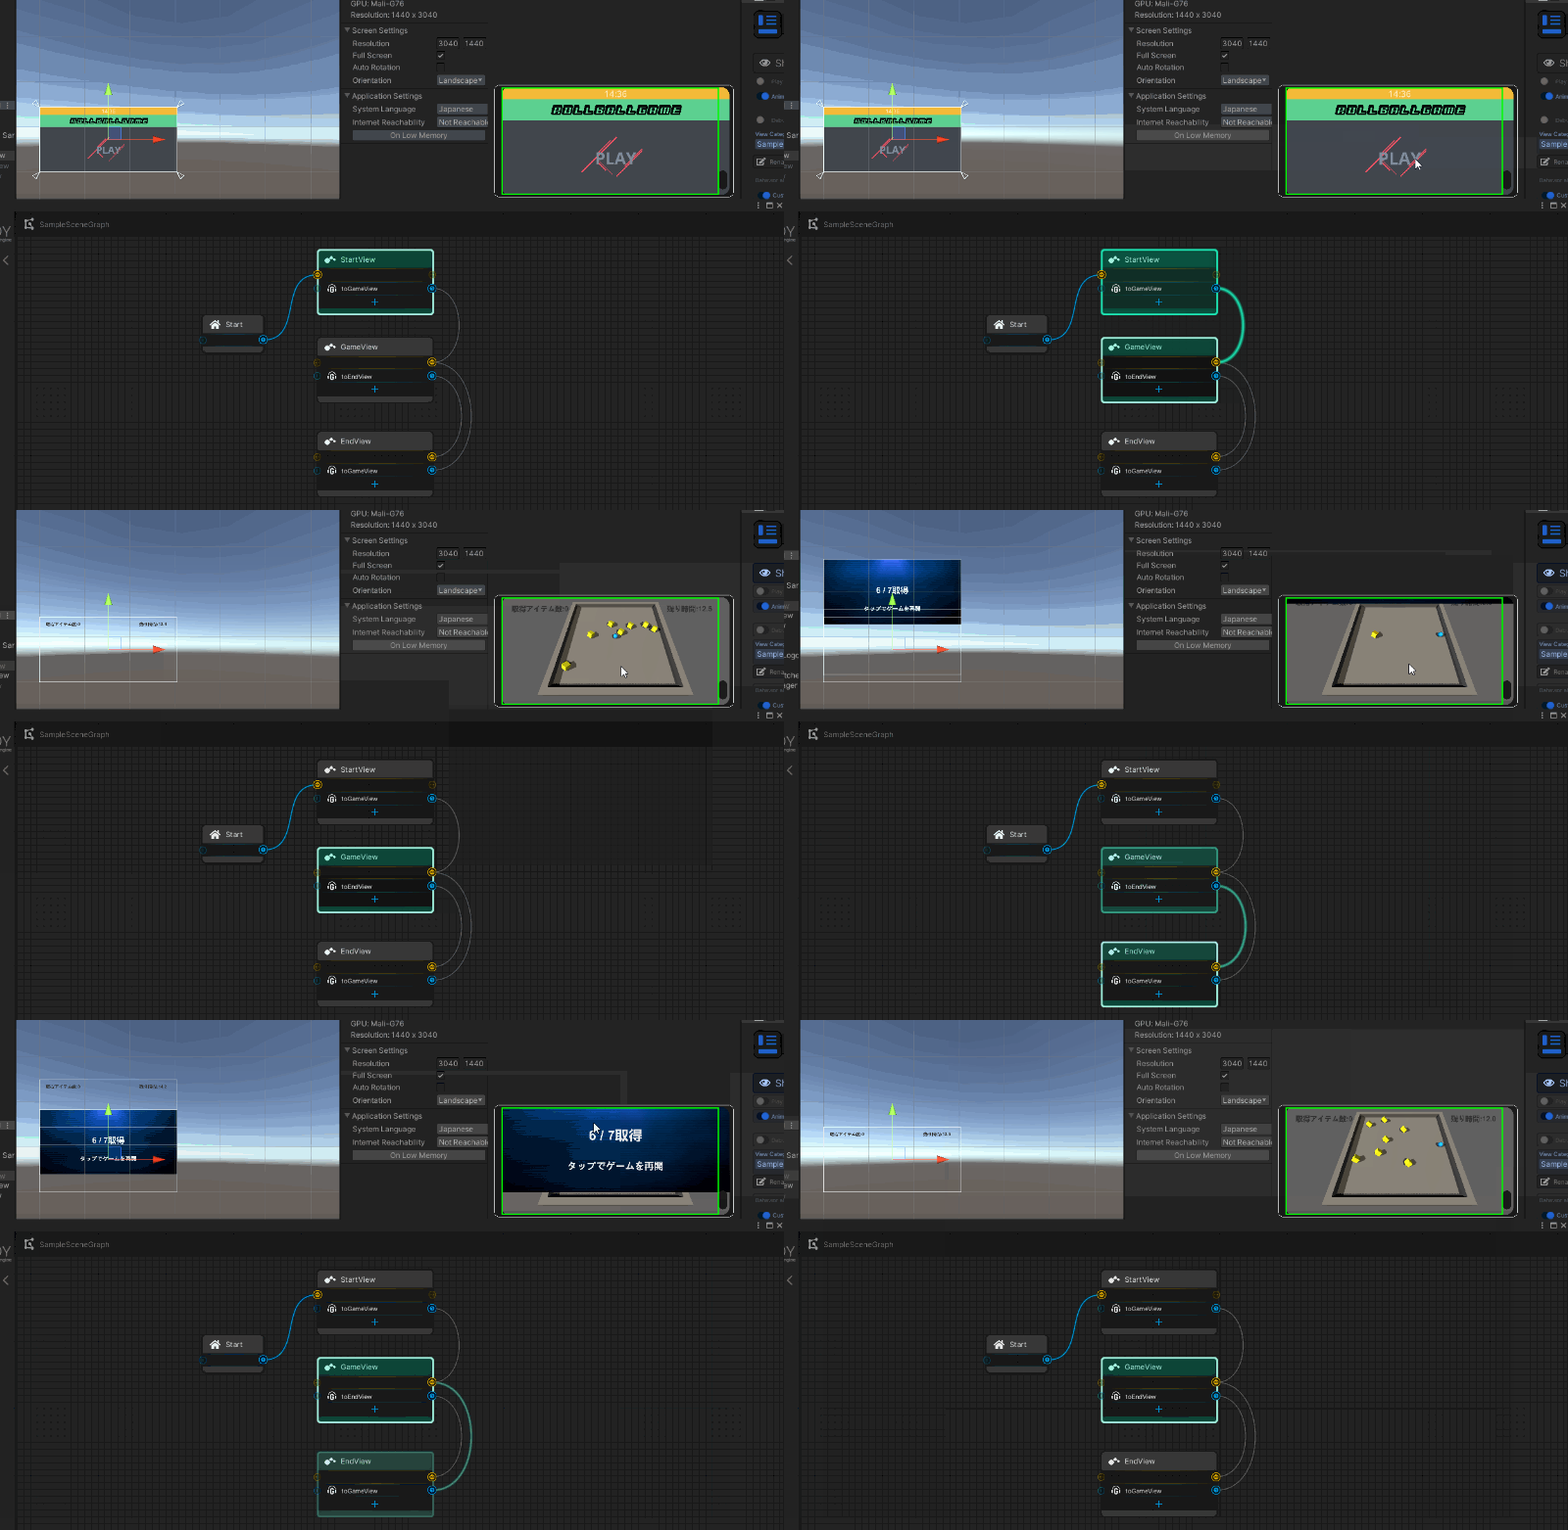
今回作成したものはAndroind向けに作っています. f:id:ayousanz:20201116173535g:plain

公式サンプルからの変更点と追加点

  • タイトル画面と終了画面の追加とアニメションの設定
  • ボールの操作をJoyStickに変更

タイトル画面と終了画面の追加とアニメションの設定

画像や文字の装飾はUI - Builderを使用して,画面の作成を行いました.

タイトル部分の変更

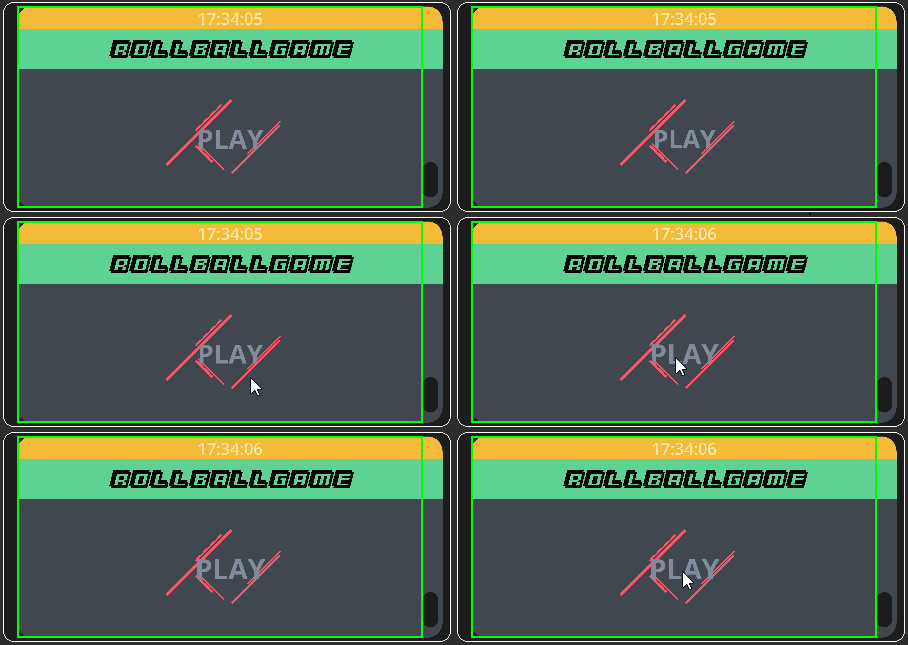
タイトル画面の「PLAY」のアニメーションはDOTweenを使用して以下のようにしています

TweenはそのままにしているとGCが残るため,タイトルからゲーム開始に移行するときに_tweener.Kill() を呼び出してKillをしています.

f:id:ayousanz:20201117132729g:plain

public class StartViewManager : MonoBehaviour
{
    [SerializeField] private Text time = default;

    [SerializeField] private GameObject playLogo = default;

    private Tweener _tweener;
    // Start is called before the first frame update
    void Start()
    {
        this.UpdateAsObservable().Subscribe(_ =>
        {
            time.text = DateTime.Now.ToLongTimeString();
        }).AddTo(this);
        _tweener = playLogo.transform.DOScale(new Vector3(1.3f, 1.3f), 1f).SetEase(Ease.Linear).SetLoops(-1,LoopType.Yoyo);
    }

    public void OnKillDOTween()
    {
        _tweener.Kill();
    }
}

終了画面の変更

タイトルと同様にしています.

f:id:ayousanz:20201117133315g:plain

終了画面は繰り返し使うため,_tweener.Kill() を呼んでいません

(Killを呼びと2回目にアニメーションが実行されなかったため..何か方法はあると思いますが調べられていません)

void Start()
    {
        _tweener = restartLogo.transform.DOScale(new Vector3(1.3f, 1.3f), 1f).SetEase(Ease.Linear).SetLoops(-1,LoopType.Yoyo);
    }

ボールの操作をJoyStickに変更

assetstore.unity.com

こちらのアセットを使用してJoyStick化にしました やり方は以下のサイトを参考にしています

qiita.com

Doozyを使って書き換えていく

DoozyUIを使って変更した点は以下になります.

  • CanvasをDoozyUIに変更
  • Canvasの表示・非表示をグラフを使って管理

準備等

  1. DOTweenのimport

    DoozyUIを使う前にDOTweenまたは DOTween Proのどちらかが必要になります.

  2. Text Mesh Proのimport

    TextMeshProをPackageManagerからImportします

  3. DoozyUIのimport

    DoozyUIをimportします.

Canvasの変更とグラフの作成

StartView・GameView・EndViewがあるので,それに対応するViewをDoozyUI側で作成します

使うViewの作成

f:id:ayousanz:20201117134055p:plain

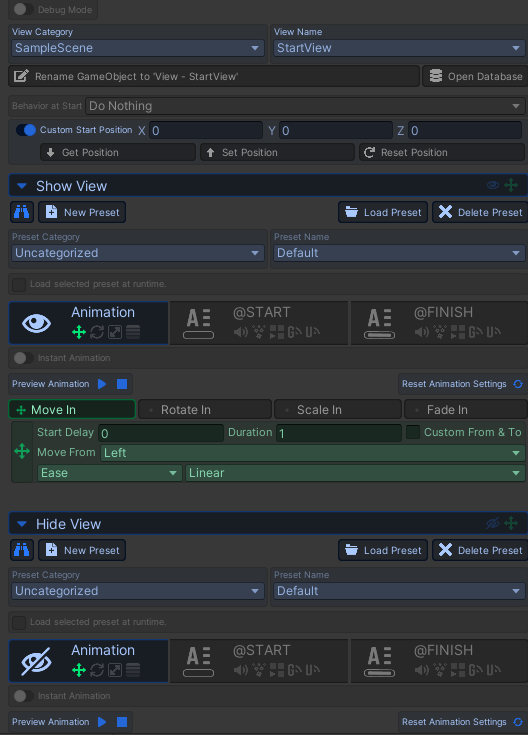
Viewの設定は自分で作成したViewにそれぞれ設定をします.

この時にShowViewとHideViewを設定しておきます(これがないと表示切替のときに表示されないみたいです)

ほかのView(GameView・EndView)も同様に設定を行います.

f:id:ayousanz:20201117165919p:plain

それぞれのViewを設定した後にView同士をNodeでつないでいきます.

Viewの切り替えは画面タッチを以下(Input.cs(仮))のように取得していましたが,グラフ上でも切り替わってほしいため,GameEventMessage.SendEvent("toGameView"); を使用してイベントで知らせます. 詳しい内容は以下のサイトを参考にしています.

3dcg-school.pro

Input.cs(仮)

        if (Input.touchCount > 0)
        {
            Touch touch = Input.GetTouch(0);
            if (touch.phase == TouchPhase.Began)
            {
                if (gameState == GameState.Title)
                {
                    TitleViewHandler();
                }else if (gameState == GameState.End)
                {
                    EndViewHandler();
                }
            }
        }

GameEventMessage.SendEvent 設定後 画面の切り替えを確認すると以下のようになります.

f:id:ayousanz:20201117173253g:plain

使用したアセット

assetstore.unity.com

assetstore.unity.com

assetstore.unity.com

assetstore.unity.com

assetstore.unity.com

github.com

assetstore.unity.com

Unity ML-Agents 複数環境実行でのCPUのコア数とスレッド数の違いにおける処理速度

ちょっと調べてみたのですが,結局わからなかったので自分で測ってみました 結果は,私の環境ですので他のところだと違う結果になる可能性は高いと思われます.

結論

今回はコア数に依存しました

環境

  • Ryzen 7 2700X Eight-Core Processor ( 8core/16thread)
  • memory 64GB
  • Unity2019.4.12f1
  • ML-Agent 1.0.5
  • Anaconda 4.8.5
  • Python 3.7.9
  • tensorflow 2.3.1

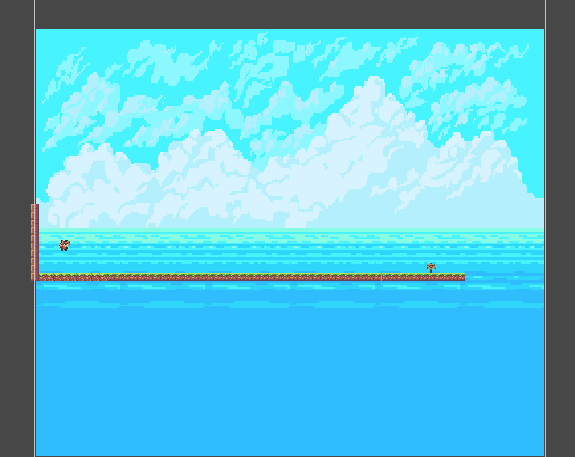
測定するゲーム

以下の画像のもので測定を行いました f:id:ayousanz:20201011202326p:plain

スタート位置・ゴール位置は固定です

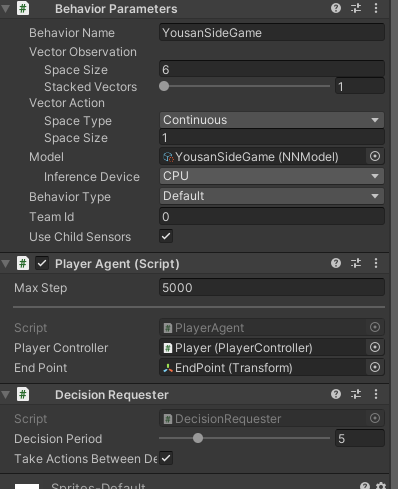
Agent 設定

f:id:ayousanz:20201011202442p:plain

ハイパーパラメータ設定

behaviors:
  YousanSideGame:
    trainer_type: ppo
    hyperparameters:
      batch_size: 2048
      buffer_size: 10240
      learning_rate: 3.0e-2
      beta: 0.005
      epsilon: 0.2
      lambd: 0.95
      num_epoch: 3
      learning_rate_schedule: linear
    network_settings:
      normalize: true
      hidden_units: 64
      num_layers: 2
    reward_signals:
      extrinsic:
        gamma: 0.99
        strength: 1.0
    keep_checkpoints: 5
    checkpoint_interval: 500000
    max_steps: 200000
    time_horizon: 512
    summary_freq: 10000
    threaded: true

agentのscript

PlayerController.cs

using UniRx;
using UniRx.Triggers;
using UnityEngine;

public class PlayerController : MonoBehaviour
{
    [SerializeField] private float speed = 0.3f;
    
    private Rigidbody2D _rigidbody2D;
    [SerializeField] private float jumpSpeed = 300.0f;
    [SerializeField] private bool isJump = true;
    [SerializeField] private GameObject startPoint;

    // Start is called before the first frame update
    void Start()
    {
        _rigidbody2D = GetComponent<Rigidbody2D>();
        // this.UpdateAsObservable().Subscribe(_ =>
        // {
        //     
        //     float horizontalInput = Input.GetAxis("Horizontal");
        //     float verticalInput = Input.GetAxis("Vertical");
        //     
        //     if (horizontalInput > 0)
        //     {
        //         RightMove(horizontalInput,verticalInput);
        //     }else if (horizontalInput < 0)
        //     {
        //         LeftMove(horizontalInput,verticalInput);
        //     }
        // });
        //
        // this.UpdateAsObservable().Where(_ => Input.GetKey(KeyCode.Space) && isJump).Subscribe(_ =>
        // {
        //     Jump();
        // });
        this.UpdateAsObservable().Where(_ => Input.GetKeyDown(KeyCode.R)).Subscribe(_ =>
        {
            Reset();
        });
    }

    public void RightMove(float hInput)
    {
        // Debug.Log("right move");
        transform.localScale = new Vector3(1,1,1);
        Vector2 input = new Vector2(hInput,0f);
        _rigidbody2D.velocity = input.normalized * speed;
    }

    public void LeftMove(float hInput)
    {
        // Debug.Log("left move");
        transform.localScale = new Vector3(-1,1,1);
        Vector2 input = new Vector2(hInput,0f);
        _rigidbody2D.velocity = input.normalized * speed;
    }

    public void Jump()
    {
        _rigidbody2D.velocity = Vector2.up*jumpSpeed;
        isJump = false;
    }
    

    private void OnCollisionEnter2D(Collision2D other)
    {
        if (other.gameObject.CompareTag("Ground"))
        {
            isJump = true;
        }
    }
    public void Reset()
    {
        transform.localPosition = startPoint.transform.localPosition;
        _rigidbody2D.velocity = Vector2.zero;
        _rigidbody2D.AddForce(Vector2.zero);
    }

    public bool GetIsJump()
    {
        return isJump;
    }
    
    
}

PlayerAgent

using Unity.MLAgents;
using Unity.MLAgents.Sensors;
using UnityEngine;

public class PlayerAgent : Agent
{
    public PlayerController playerController;
    private Rigidbody2D _rigidbody2D;
    public Transform endPoint;

    public override void Initialize()
    {
        _rigidbody2D = GetComponent<Rigidbody2D>();
    }

    public override void OnEpisodeBegin()
    {
        playerController.Reset();
    }

    public override void CollectObservations(VectorSensor sensor)
    {
        // gold position : 2point
        sensor.AddObservation(endPoint.transform.localPosition.x);
        sensor.AddObservation(endPoint.transform.localPosition.y);
        
        // Agent position : 2point
        sensor.AddObservation(transform.localPosition.x);
        sensor.AddObservation(transform.localPosition.y);
        
        // Agent velocity :2point
        sensor.AddObservation(_rigidbody2D.velocity.x); 
        sensor.AddObservation(_rigidbody2D.velocity.y);
        
    }

    public override void OnActionReceived(float[] vectorAction)
    {
        AddReward(-0.0001f);
        float h = vectorAction[0];
        // if(vectorAction[1] == 1f && playerController.GetIsJump()) playerController.Jump();
        if(0f < h) playerController.RightMove(h);
        else if(h < 0f) playerController.LeftMove(h);
        
    }

    public override void Heuristic(float[] actionsOut)
    {
        actionsOut[0] = Input.GetAxis("Horizontal");
        // actionsOut[1] = Input.GetKey(KeyCode.Space) ? 1.0f : 0.0f;
    }
    
    private void OnTriggerEnter2D(Collider2D other)
    {
        if (other.gameObject.CompareTag("EndPoint"))
        {
            Debug.Log("is goal");
            SetReward(1.0f);
            EndEpisode();
        }else if (other.gameObject.CompareTag("Finish"))
        {
            Debug.Log("is game over");
           SetReward(0.0f);
           EndEpisode();
        }
    }


}

結果

step数:190000での比較です(一回目のスクショがミスっていたため,200000が映ってなかったです..)

  • 4 env : Time Elapsed 240.355s
  • 8 env : Time Elapsed 217.626s
  • 16 env : Time Elapsed 222.897s
  • 32 env : Time Elapsed 215.245s

ログスクショ

以下,それぞれの実行環境数の結果スクショです

f:id:ayousanz:20201011203201j:plain
実行環境数:4
f:id:ayousanz:20201011203213j:plain
実行環境数:8
f:id:ayousanz:20201011203303j:plain
実行環境数:16
f:id:ayousanz:20201011203318j:plain
実行環境数:32

TensorBoardスクショ

Cumulative Reward

f:id:ayousanz:20201011203814p:plain

Episode Length

f:id:ayousanz:20201011203841p:plain

Policy

f:id:ayousanz:20201011203905p:plain